
[ad_1]
Within the eyes of many drone house owners, the DJI Air 3 is a robust, general improve to the extremely in style DJI Air 2S.

Just like the Air 2S, the Air 3 has an amazing cost-to-feature ratio. You get a number of new options and expertise for the cash spent.
With the addition of the first-ever omnidirectional impediment avoidance system applied in a DJI Air drone, the Air 3 is much more accessible to newcomers and safer to fly than beforehand launched drones beneath the Air badge.
Which means increasingly more folks proceed to buy the Air 3, and plenty of accomplish that with a eager curiosity in taking the very best images they’ll with the Air 3.
This text will function an entire information to DJI Air 3 Pictures overlaying:
- The Publicity Triangle: Aperture, ISO, and Shutter Pace
- White Stability
- RAW vs JPG Picture Codecs
- Air 3 Nonetheless Pictures Modes
- Miscellaneous Digicam settings
- The Advantages of Picture Modifying
Transient Overview
Not too long ago launched in 2023, the Air 3 is the extremely anticipated improve to the favored Air 2S, which was launched two years earlier in 2021.
DJI used the two-year hole to place a ton of options and expertise into the Air 3. These upgrades make the Air 3 a superb selection for brand spanking new pilots and fanatics. These trying to do business video work may also take pleasure in it.
Whereas the Air 3 does have smaller essential and secondary cameras than the DJI Air 2S’ 1″ CMOS digital camera, it does have fairly a number of main upgrades, a few of that are additionally seen within the costlier Mavic 3 sequence.
- Twin-camera system giving videographers excellent parallax results to assist inform their story
- Omnidirectional impediment sensing, which ensures the Air 3 stays conscious of its environment whereas in flight.
- OcuSync 4 Video Transmission System for stronger, interference-free video indicators, permitting for worry-free flights in city areas
- Enhanced monitoring and added flight modes for solo content material creators, solo shooters, and anybody who likes to trace topics
Air 3 Digicam
As talked about earlier, the Air 3 has twin cameras, just like the unique Mavic 3’s setup, though these are a bit smaller at 1/1.3″ sensors, versus the Mavic 3’s 4/3 cameras.
The principle digital camera on the Air 3 is equal to 24mm with an f/1.7 aperture, and the tele lens digital camera is equal to 70mm with an f/2.8 aperture. Each of those cameras take the identical decision images.
The brand new 70mm digital camera is ideal for getting nice shot views whereas sustaining distance out of your topic.
It is a plus as a result of not solely can you keep away from irritable people who look negatively at drones, however the Air 3 can get a lot nearer images of any topic of your selecting from additional away, preserving the Air 3 away from obstacles.
Many followers of the Air 2S have puzzled why DJI determined to make use of dual-1/1.3″ sensors as a substitute of both a 1-inch 24 mm digital camera and a 1/1.3 70 mm tele digital camera or twin 1-inch cameras.
This resolution has continued to be an space of debate for a lot of.
Fortunately, for a lot of hobbyists, the brand new back-lit stacked picture sensor on each cameras produces good photographs. Moreover, with the f1.7 aperture 1/1.3″ sensor, the Air 3 takes respectable mixed-light and low-light photographs.

| Digicam | DJI Air 3 |
|---|---|
| Extensive-Angle Digicam: | 1/1.3-inch CMOS, Efficient Pixels: 48 MP Pictures decision: 8064x6048px FOV: 82° Format Equal: 24 mm Aperture: f/1.7 |
| Medium Tele Digicam: | 1/1.3-inch CMOS, Efficient Pixels: 48 MP Pictures decision: 8064x6048px FOV: 35° Format Equal: 70 mm Aperture: f/2.8 |
» MORE: Finest Digicam Settings for DJI Air 3 (Picture & Video)
48 MP Picture Efficiency
One of many extra sought-after picture choices on the Air 3 is the flexibility to shoot 48 MP images.
This was one thing launched again within the days of the Air 2 and has trickled down by way of varied DJI drones, together with the Air sequence.
When capturing 48 MP, though the cameras are technically 12 MP, a expertise referred to as Quad Bayer is employed. In layman’s phrases, Quad Bayer expertise principally quadruples every megapixel within the digital camera, leading to sharper images.
You might need observed that up thus far, I’ve used the phrases “okay, good, and respectable” a good bit when speaking in regards to the Air 3’s picture high quality. That is particularly directed on the 48 MP picture possibility.
I’ll put this proper out entrance. In all honesty, at the moment, as of this text’s launch, on the 48 MP facet of issues, the Air 3 digital camera for images functions works okay.
Presently, for a lot of, Air 3 48 MP images will not be spectacular, just like the 20 MP photographs on the Mavic 3 Professional. Nor does the Air 3 take the identical high quality 48 MP images because the Mini 4 Professional, though it used to.
That is coming from somebody who has used two totally different Air 3s since launch, each recreationally and professionally, and I proceed to make use of the Air 3.
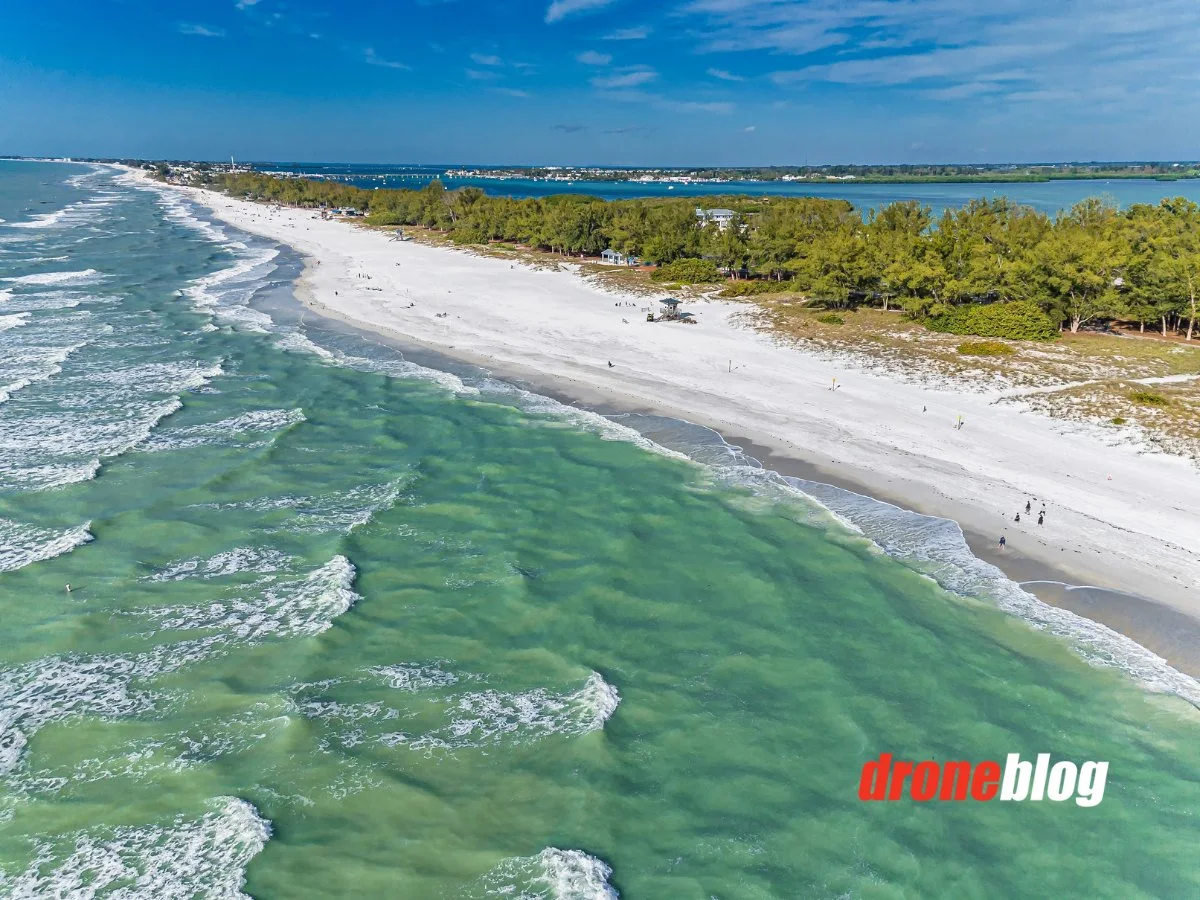
When the Air 3 was first launched and reviewed right here at Droneblog, the 48 MP images had been actually good, nice even. There was not any excessive chromatic aberration or fringing, and the images had been very sharp.
Under is an early overview instance of a photograph taken at 48 MP.


Just a few months after the Air 3’s launch, a firmware replace was then put out that induced the 48 MP photographs to be barely blurry, with elevated chromatic aberration and noticeable artifacts.
The 48 MP picture under was taken after the firmware replace in query. Lots of picture modifying in each Lightroom and Luminar was wanted to get the picture to the place it was usable. It’s nonetheless noticeably blurry, even after working the picture by way of Topaz Sharpen.


DJI was made conscious of the difficulty and has since launched subsequent firmware updates to handle a few of these points. Nevertheless, the 48 MP photographs will not be what they initially had been upon the Air 3’s unique launch.
Due to this, all photographs taken particularly for this text had been shot as normal 12 MP RAW images. Moreover, as of just lately, I’m solely capturing 12 MP leisure images with the Air 3 in the intervening time.
With all of this being stated, the Air 3 does certainly shoot glorious 12 MP images. Shortly, we’ll see a number of examples that showcase this.
» MORE: Drone Pictures: Newbie’s Information to Getting Began
Pictures Fundamentals for the Air 3
We’ll now discuss a number of images fundamentals that, as soon as understood, ought to elevate images taken with the Air 3 from simply okay to the very best they are often.
This data can also be the identical for any DSLR or Mirrorless digital camera one usually makes use of.
Aperture
The aperture, on any digital camera, and never simply drones, is the outlet or opening you’ll see in the event you look into the digital camera lens.
The bigger the aperture opening (i.e., f/1.7), the extra mild will get in and the brighter the picture. The smaller the aperture opening (i.e., f/22), the much less mild will get in, leading to a darker picture.
Moreover, the aperture additionally controls how blurry or sharp a background is. That is extra noticeable when utilizing DSLR and Mirrorless cameras.
When the aperture is open extra (i.e., f/1.7), the shallower the depth of discipline is: the background behind and round your topic begins to blur out.
With the aperture closed down (i.e., f/16), the background is sharper or extra in focus, with every thing within the shot showing to be clearer.
» MORE: What Is Drone Pictures? (Defined for Newcomers)
Right here’s a fast phrase in regards to the Aperture on the Air 3
The Air 3’s twin digital camera system makes use of two separate apertures for the twin cameras.
The 24mm wide-angle digital camera has a hard and fast aperture of f/1.7, whereas the 70mm tele digital camera has an aperture of f/2.8.
In contrast to the cameras on the professional-level Mavic 3 Collection, the apertures on each Air 3 cameras are mounted. They can’t be adjusted to help in correctly exposing pictures or altering the depth of discipline.
ISO
ISO is the precise identify for the perform that measures a digital camera sensor’s sensitivity to mild. ISO is used and could be adjusted for each images and movies.
On the Air 3, ISO 100 is the bottom, or darkest worth, and when capturing video, it may be as excessive as 12800 in evening mode (brightest).
Generally, when taking photos, the decrease the ISO, the higher.


Low ISO values be sure that images will not be noisy or grainy. It’s prompt that, every time the scenario permits, shoot with an ISO worth of 100.
In fact, like with something in images, you may must make exceptions to this rule. There could also be instances when the “keep at ISO 100 rule” should be adjusted to attain higher scene publicity.
With the Air 3’s essential 24mm broad digital camera having such an open and quick aperture of f/1.7, taking images utilizing ISO 100 works effectively, particularly in low-light conditions.
» MORE: Finest Drones for Night time Time Use (Pictures & Video)
Shutter Pace
Shutter velocity serves two distinct functions for images: publicity and movement blur.
Publicity
In case your images have to be brightened or darkened, exterior of the ISO values, you’ll be able to up the shutter velocity, which is able to darken the picture, or sluggish the shutter velocity, which is able to brighten the picture.
The Air 3 will routinely modify the shutter velocity when in Auto Mode to brighten or darken the picture.
Movement Blur (For Images)
You may wish to seize one thing in movement as a blur when taking drone images.
You’ll significantly see this in panorama images, the place there may be working water within the type of waves or waterfalls, and the water has a dreamlike smooth impact.
This comes from utilizing a sluggish shutter velocity. The slower the shutter, the extra movement blur within the image.
» MORE: EXO Drones vs. DJI (Which Drones Are Finest?)
White Stability
In all points of images, white stability evens out the colour temperature in a picture to make the picture look extra pure.
That is additionally true with the Air 3.
Colour temperature is measured in Kelvin (ok). 10,000k is Blue, 1,000k is Orange, and there’s a full spectrum of variations, intensities, and hues throughout the ranges of blue and orange.
When the white stability is about appropriately within the DJI Fly app, the colour white falls extra in step with the precise colour white, normalizing the look of the complete picture for the circumstances through which the image might be taken.
The DJI Fly app has a white stability slider that lets you decide the numerical kelvin (ok) worth. If that is too difficult, you’ll be able to select auto.
Moreover, to fine-tune what you see on-screen, you’ll be able to take the White Stability out of Auto after which make slight changes from there with the slider.
» MORE: Drone Pictures Planning (Defined for Newcomers)
Picture Picture Codecs: JPEG or RAW (DNG)?
We’ll discuss briefly in regards to the picture codecs the Air 3 is able to capturing. These are JPEG and RAW. On the Air 3, the RAW information are DNG information.
JPEG information are the simplest information to work with for social media. Newcomers and the social media acutely aware can shortly slap a social media filter on the images and share them.
It is because JPEG information are compressed and totally processed information and comprise much less data than RAW (DNG) information. These information are just about full and able to share on-line, with no modifying required, though you’ll be able to certainly manipulate the information some.
RAW information, or in DJI’s case, DNG information, are uncompressed, unprocessed information that comprise all the knowledge the Air 3 collects for stated photographs. A few of this data would come with:
- the vary of the picture’s colours
- dynamic vary data (highlights & shadows)
- white stability, and so on.
With the huge array of editable data DNG information retain, these information are utilized by photographers who like to make use of picture modifying software program.
Utilizing software program comparable to Photoshop, Lightroom, and Luminar AI/Neo (to call a number of) permits for in-depth artistic imaginative and prescient. On the finish of this text, we might be speaking a bit extra about picture modifying and the outcomes that may be achieved.
» MORE: Actual Property Drone Pictures (A Full Information)
Taking Images with the Air 3
Now we’ll have a look at the varied images modes obtainable on the Air 3, in addition to selecting the best settings for taking photos, and a few of the instruments obtainable to attain higher images.
Nonetheless Pictures Modes
For these conversant in Mirrorless or DSLR cameras, the DJI Air 3 is able to taking photos with picture modes which might be just like common floor cameras. These modes are:
- Single Shot: 12 MP and 48 MP
- Burst Capturing: 12 MP, 3/5/7 frames; 48 MP, 3/5 frames
- Automated Publicity Bracketing (AEB): 12 MP, 3/5 frames; 48 MP, 3/5 frames at 0.7 EV step
- Timed: 12 MP, 2/3/5/7/10/15/20/30/60 s; 48 MP, 5/7/10/15/20/30/60 s
Single Shot

The only-shot mode does precisely that. If you press the main target/shutter button, the Air 3 will take a single picture. After this, you body up or compose your subsequent shot and press the shutter button to take one other picture.
This mode is ideal for individuals who wish to leisurely snap a number of particular images whereas flying.
Burst Capturing
When Burst Capturing with the Air 3, you’ll be able to set the variety of images you’d prefer to routinely be taken if you press the shutter button.
It is a rapid-fire mode that can take a particular variety of consecutive images. You may set the mode to shoot 3, 5, or 7 picture bursts when taking 12 MP images. If taking 48 MP you’ll be able to specify 3 or 5 picture bursts.
This mode is nice for getting consecutive pictures of your topic engaged in some form of motion.
» MORE: DJI Mini 3 vs. Air 3 (Right here’s My Selection)
AEB (Automated Publicity Bracketing)
Auto Publicity Bracketing is a technique used to seize images to then use in HDR (excessive dynamic vary) images. HDR images retain the highlights and shadows of a photograph, so every thing within the picture is seen.

The AEB methodology is very in style in Actual Property and Panorama images, as this methodology captures a correctly uncovered picture, an over-exposed picture, and an under-exposed picture.
After the picture is taken, the picture could be blended collectively utilizing modifying software program, creating an HDR picture. With HDR images, all points of the picture (highlights, mids, and shadows) might be correctly uncovered and viewable.
AEB images could be set in intervals of three or 5 frames per shutter press.
Timed
Apart from simply getting nice aerial pictures, drones are nice for group selfies.
With the Timed picture mode, a timer could be set within the DJI Fly app to set off the Air 3 to take a photograph. That is helpful when taking single or group selfies, and the pilot wish to disguise the controller (i.e., put it down) after framing the shot.
Timed pictures could be taken with intervals of two to 60 seconds when taking 12 MP images, or 5 to 60 seconds when capturing 48 MP images.
» MORE: DJI Air 3 – Lively Observe (All You Must Know with Video)
Auto or Professional (Handbook) Digicam Mode?
When flying the Air 3, it might by no means be stated it suffers from a scarcity of choices on the subject of taking images (or movies, for that matter).
The Air 3 caters to all ranges of photographers. From newcomers to intermediate to superior.
For individuals who wish to simply level and shoot, with out worrying about any of the images fundamentals we mentioned up thus far, the Air 3 has an Auto Digicam mode.
When taking images in Auto, the Air 3 will do an excellent job of analyzing the scene and adjusting all the applicable settings. If eager to shortly get images and add them to social media, then capturing JPEGs in Auto works nice.
For individuals who are accustomed to capturing manually on a mirrorless or DSLR digital camera, the Air 3 has Professional Digicam mode.
Because the identify suggests, Professional Digicam mode is for individuals who are maybe professionals, fanatics, or beginner photographers.

Professional mode allows you to individually change nearly each digital camera setting to get the correct publicity and stability on your images:
- ISO
- Shutter Pace
- White Stability
- Picture Side ratio
- Picture Format
» MORE: DJI Fly App – Easy methods to Grasp Capturing in Handbook Mode
DJI Fly Pictures Instruments
If you’re trying to get probably the most out of your Air 3 images, there are various instruments throughout the DJI Fly app that support in correct composition and publicity.
These visible aids are just like those present in hottest cameras, from Sony to Canon to Nikon, and so on.
Grid Strains
The Air 3’s grid line possibility is damaged into three components:
- Rule of Thirds
- Diagonal
- Middle goal
Rule of Thirds
As with the aforementioned floor cameras, the Rule of Thirds overlay has 9 equal blocks that divide the digital camera view body.
As well as, there are 4 factors positioned on the intersecting traces. Putting your topic on a number of of those intersecting factors creates pleasing compositions.
Diagonal and/with Middle Goal
The diagonal traces, along with the middle goal, support in framing up a shot.
If you’re trying to get a selected topic immediately in the midst of the body (comparable to a automobile, particular person, or watercraft), these choices will work effectively.

» MORE: Ideas for Flying a Drone Over Water (Video)
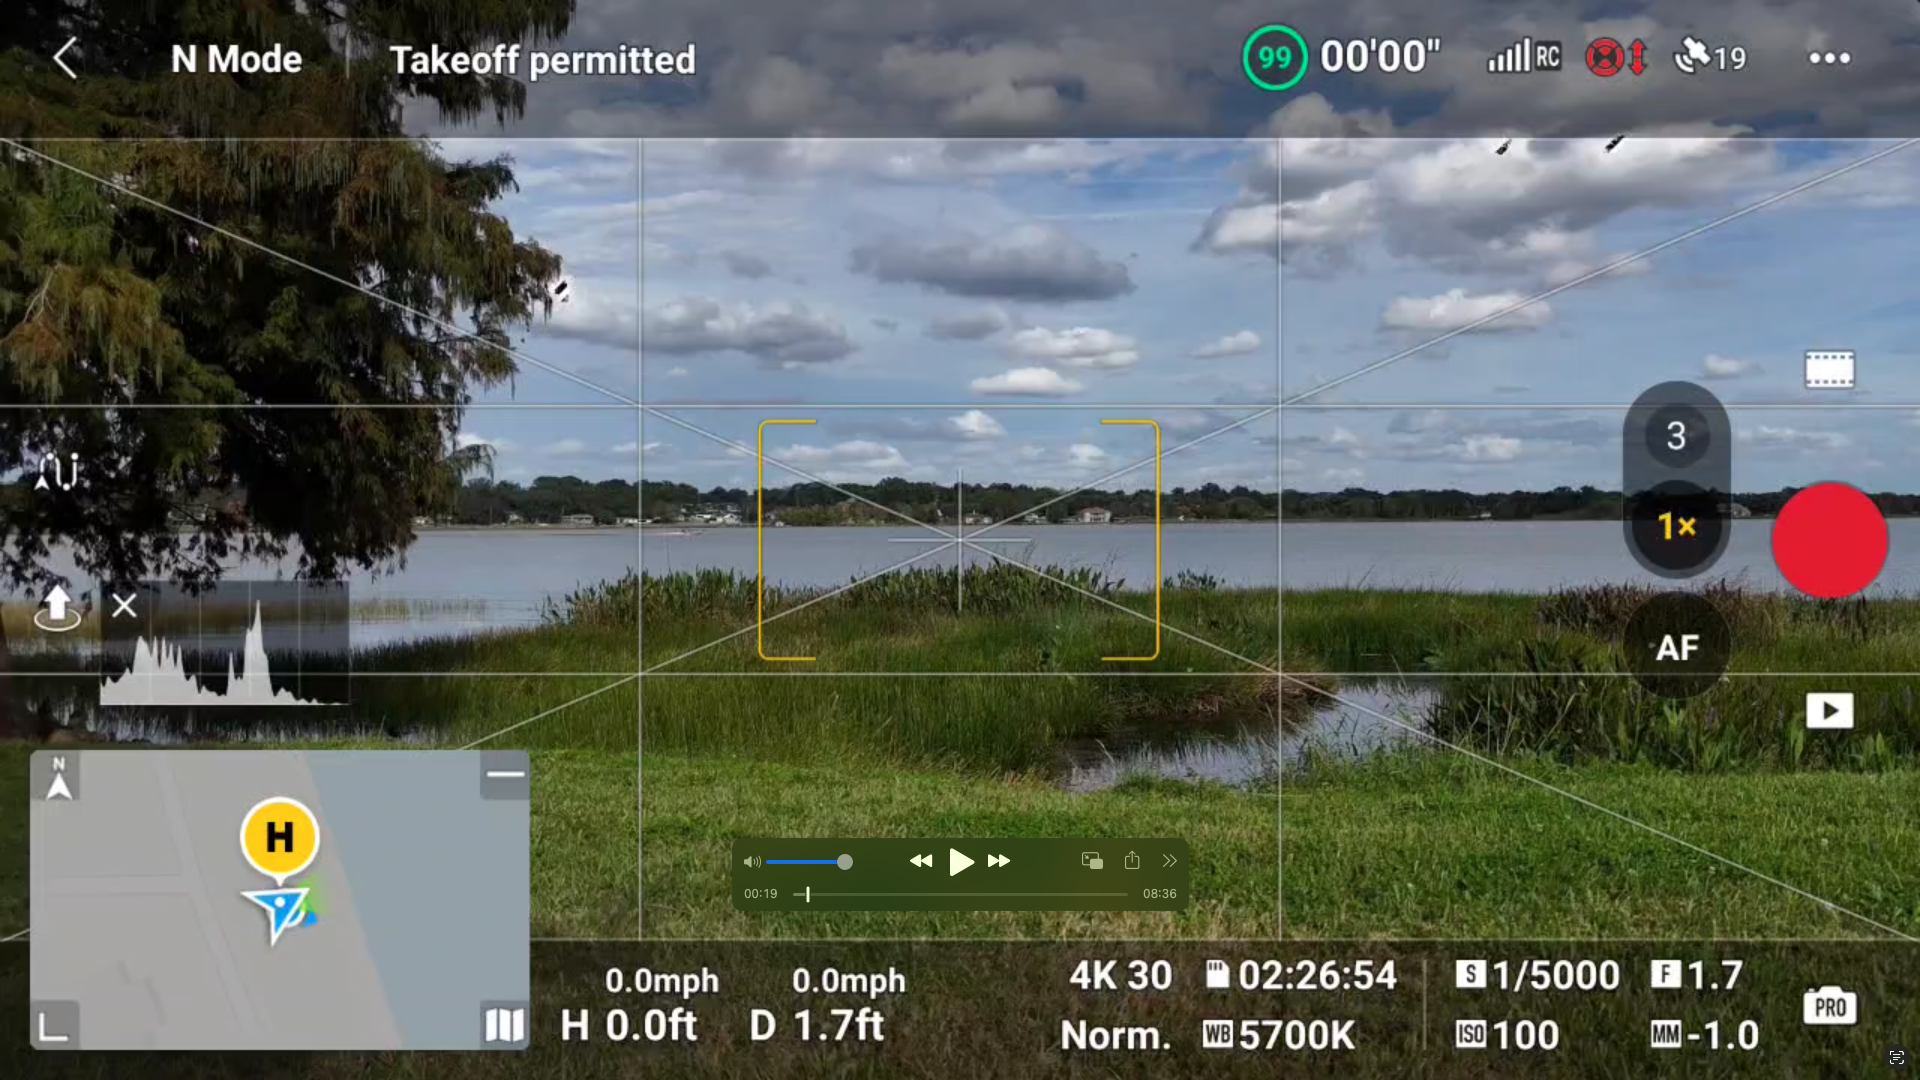
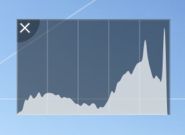
Histogram
Histograms are representations of the general publicity popping out of the Air 3’s digital camera. The aim of this small device is to maintain the picture from being too mild or too darkish.
The left facet of the histogram represents the shadows and blacks. On the correct facet, the highlights, whites, and middle characterize the mid-tones.
When a picture is correctly uncovered, it resembles a mountain extra in the direction of the center, with out extremes within the bars on the far proper and left extremes.
Under is an instance of the histogram discovered on the digital camera view display, though this specific one is overexposed.

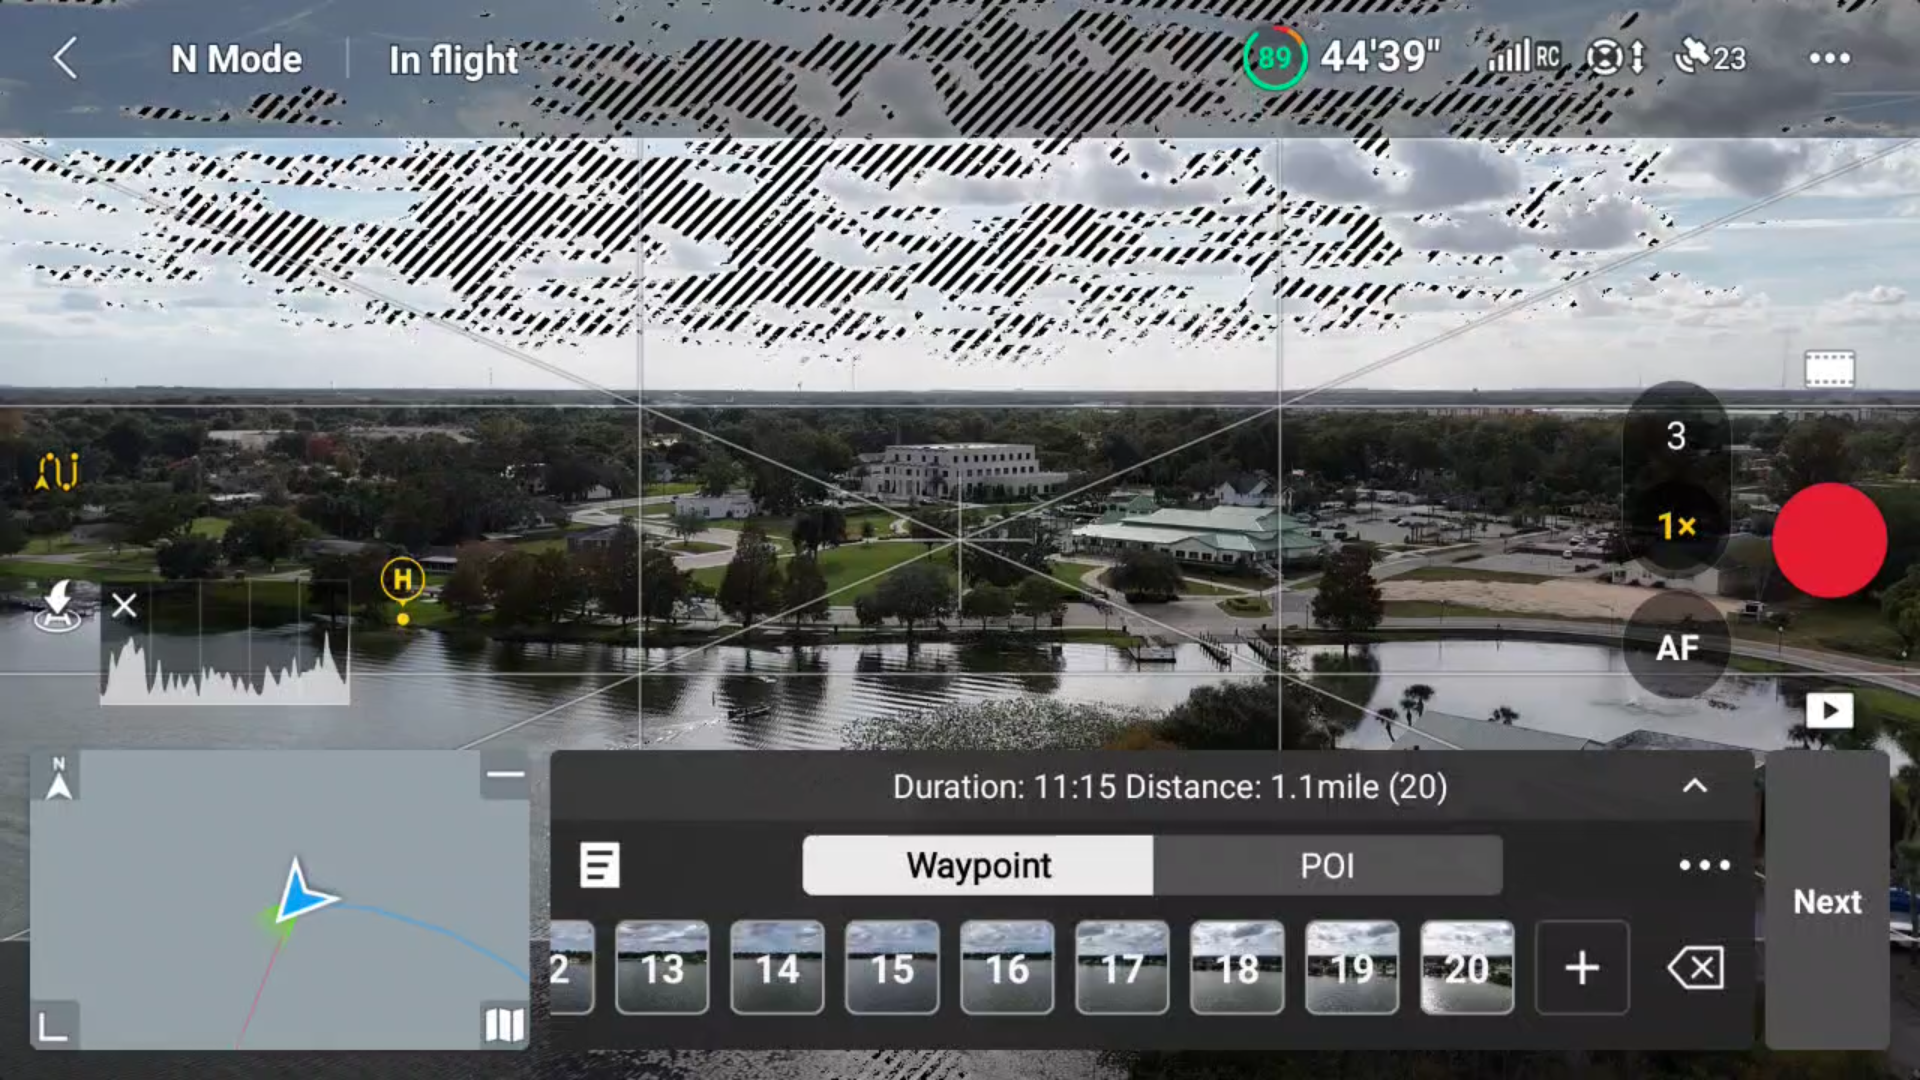
Over-Publicity Warning
The over-exposure general reveals as zebra stripes in areas of the display which might be blown out or over-exposed.
Whereas the zebra stripes do present on-screen, they don’t seem in your pictures.
Just like the Histogram, that is one other helpful elective device that assists in figuring out and correcting publicity points. It may be turned on and off.

» MORE: DJI Mini 2 SE Digicam High quality (With Footage)
Picture Modifying
To get probably the most out of the Air 3’s digital camera, we extremely counsel modifying the images utilizing some form of picture modifying software program.
Picture modifying software program is used to just do that: edit images. This software program helps the photographer to convey the image that’s in thoughts.
The entire photos on this article up thus far had been edited utilizing varied varieties of picture modifying software program.
After we communicate of modifying, we’re pointing to the manipulation of a photograph’s colour, white stability, spot elimination, texture, sharpness, publicity, and even the really feel of the scene being captured – the emotion it evokes.
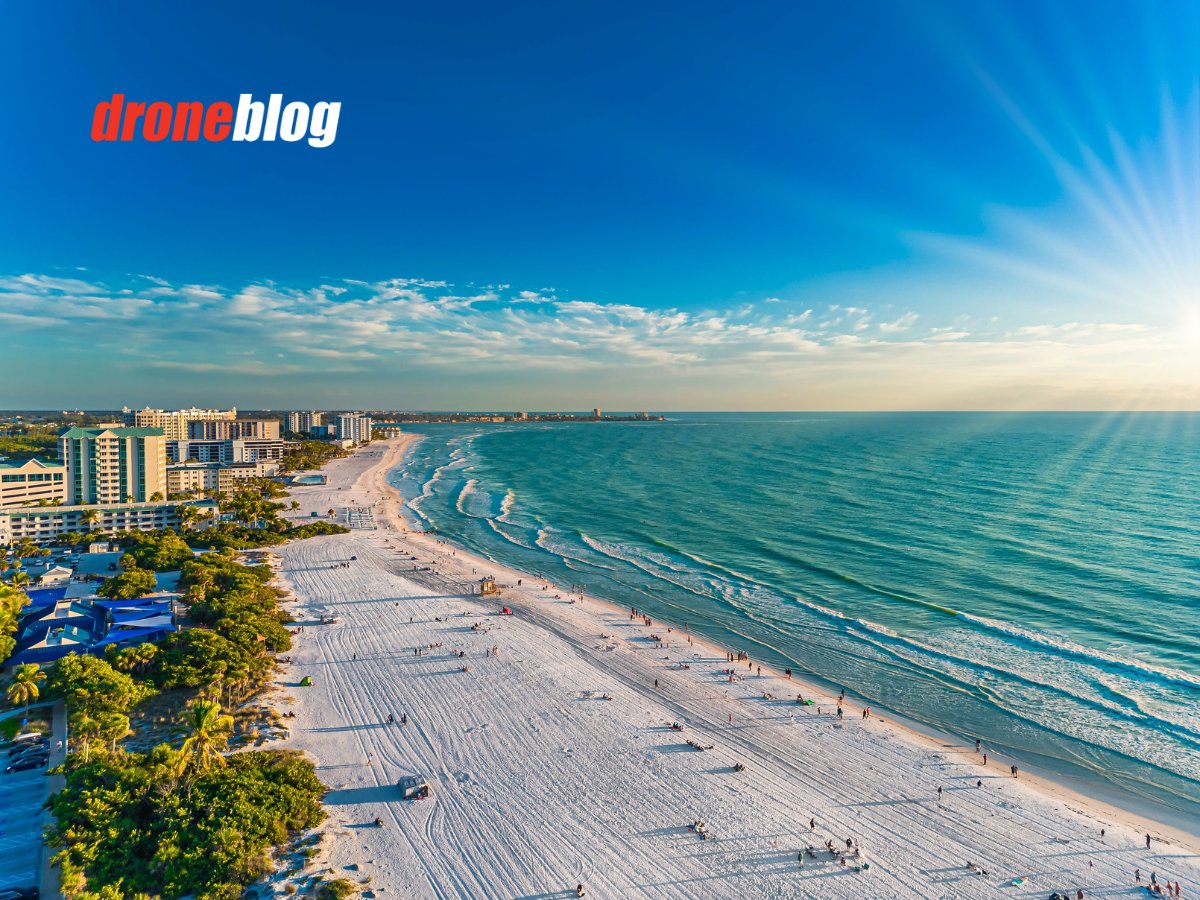
Under are simply two examples of images that had been taken with the Air 3 with no picture modifying carried out, adopted by concerned picture modifying (not an utilized social media filter).
For this picture, whereas it seems to be good, it doesn’t actually convey the true colours, essence, and feeling of the focus and environment.
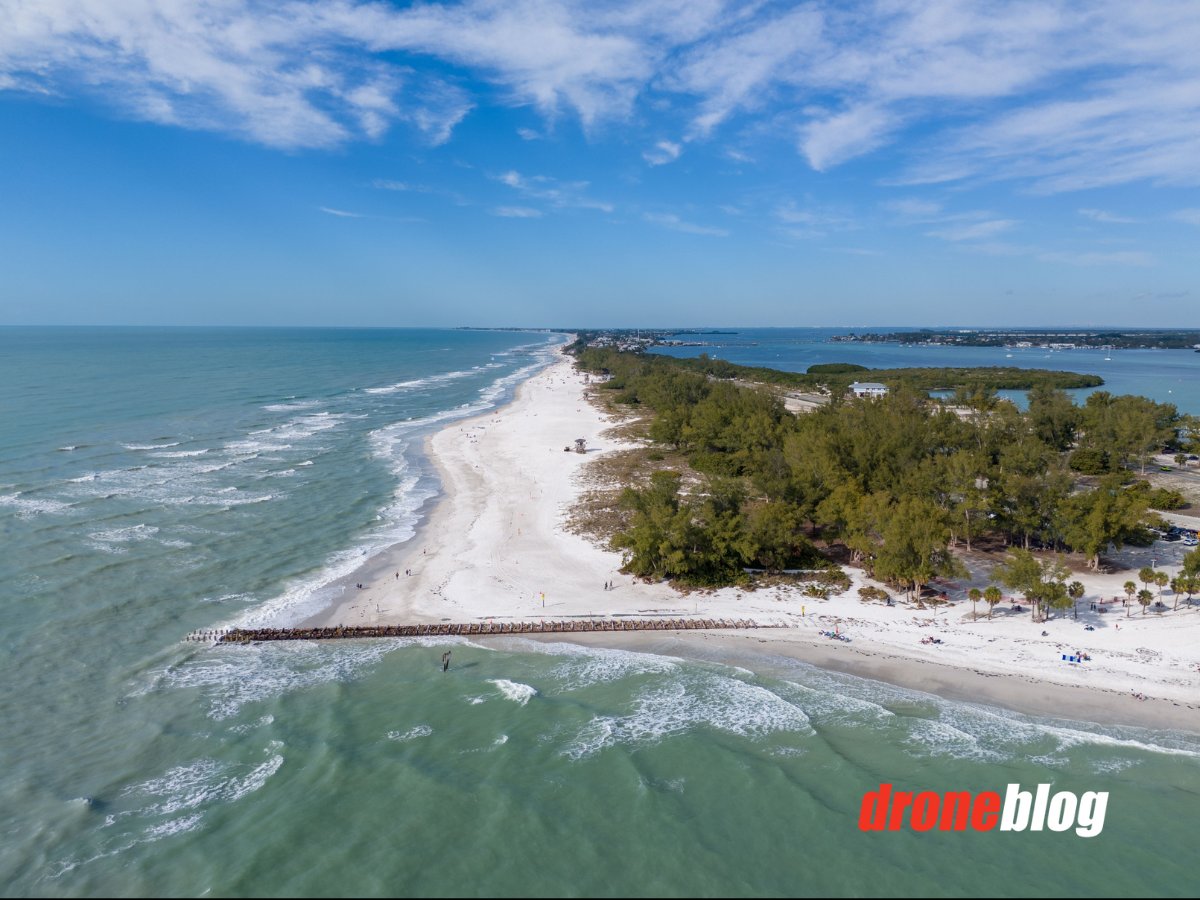
The edited model under conveys how vibrant and alive the realm felt after the gloom started to blow away for the night.

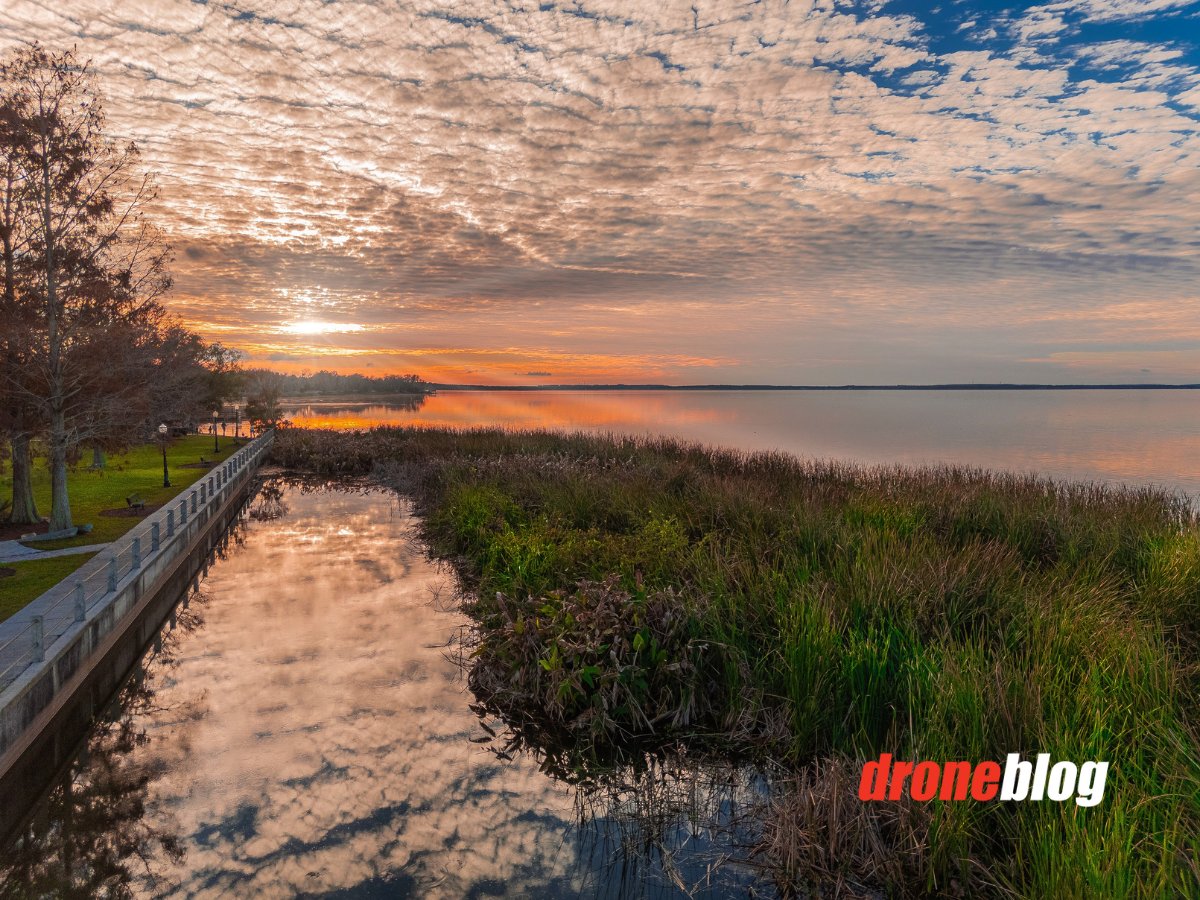
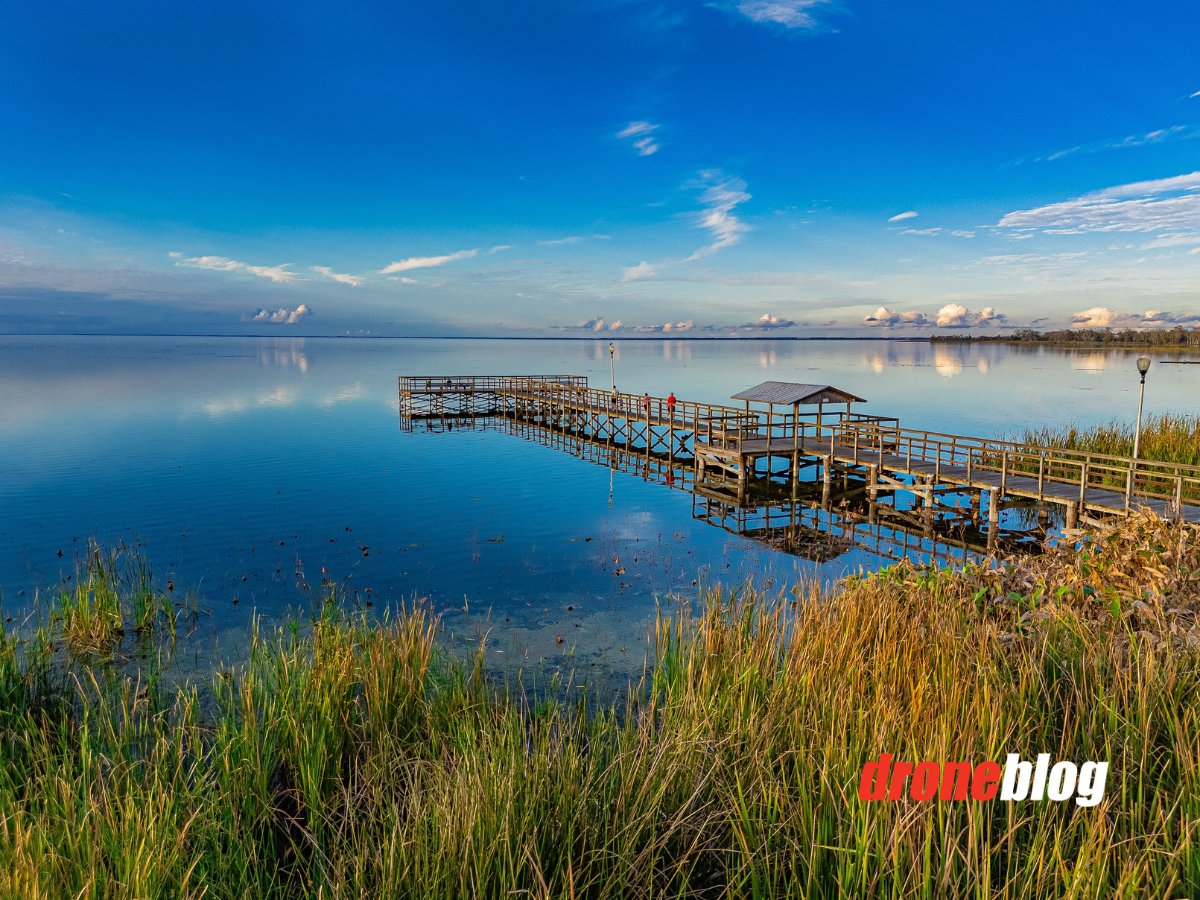
On this unedited picture, we’ve proof that the Air 3 does an amazing job at taking low/decrease mild images, as this image was taken a couple of minutes after sundown.

After modifying, the picture now extra precisely displays what I personally noticed and felt throughout this golden hour shot. Modifying not solely allowed for colour manipulation but in addition slight changes to general element and sharpness.

If you have a look at the plethora of images on-line (no matter whether or not they had been taken by drone or a normal digital digital camera), many, if not most, have been edited (even when simply barely) utilizing some form of software program.
Earlier, we spoke in regards to the variations between JPEG and DNG (RAW) information.
If you’re taking images with the Air 3 with all intent and goal of modifying the images, then the DNG (RAW) picture format is finest. Picture modifying software program will be capable to manipulate all the knowledge saved within the photographs.
A number of the extra in style picture modifying software program is:
- Lightroom (Traditional, Cell, or Customary)
- Photoshop
- Luminar (AI or NEO)
If, nevertheless, you’re planning to shortly get photos, apply a filter to them, and instantly put up them to Social Media, JPEG information are the best way to go. The JPEG format is straightforward to work with and quite a bit smaller in measurement than DNG/RAW information.
» MORE: Finest Modifying Software program for the DJI Mini 3/ Mini 3 Professional
[ad_2]